Fortnite Building Tips: From Your First Box to Pro-Level Piece Control
Actionable fortnite building tips covering boxes, tarping, 90s, piece control, movement tech, and settings so you can build cleaner, save materials, and win more fights.
Start With the Box, Not the Fancy Stuff
If building in Fortnite feels sloppy or overwhelming, the problem is almost never a lack of advanced tech. It's a shaky foundation. Every mechanic in the game — retakes, rotations, box fights — starts and ends with a clean box, which is why nearly every serious guide, including this full building breakdown on YouTube, treats it as tip number one.
A proper box follows a repeatable build order:
- Floor beneath your feet (the base of everything)
- Wall in front of you
- Swing your crosshair left and place the left wall
- Look up, place the floor above your head, then a cone
- Swing right and place the final wall
- Finish with a cone under your feet
Ignore speed entirely while learning this. Sprint down a long line of boxes in Creative, then turn around and audit your work: missing walls, skipped cones, pieces placed outside the box. Finding your own errors builds the muscle memory that makes everything else possible.
| Piece | Main Jobs | Watch Out For |
|---|---|---|
| Wall | Blocking fire, piece control, box shells | Wood walls are weakest — replace them fast |
| Floor | Foundations, ceilings, bridges, phasing up | Missing a ceiling floor exposes you from above |
| Ramp/Stair | Gaining height, ramp pushes, tarps | Unprotected ramps get shot out instantly |
| Cone | Blocking angles, retakes, sealing boxes | Precise crosshair placement decides where it lands |
Two habits pay off across every technique: keep your crosshair near where you intend to build, and run a consistent build combination in the same order every time. As covered in this controller-focused beginner guide, the Builder Pro layout gives each piece its own button so you can place any structure instantly without scrolling through a menu.
Tarping Techniques for Safe Rotations
Tarping — building a protective tunnel while moving — is your panic button for crossing open ground, rotating through zone, or surviving late-game circles. The trick is matching the tarp to the situation rather than defaulting to one style.
| Tarp | Build Rhythm | Best Used When |
|---|---|---|
| Stair tarp | Floor, side wall, stair (look at the wall to cover your back) | Scuffed rotates where you need instant cover from above and behind |
| Straight-line tarp | Floor, floor, wall, wall (manual walls, no turbo) | Team rotates where visibility and space matter most |
| Zigzag tarp | Floors above/below, drift left then right, walling each side | Crossing to the far side of zone unpredictably |
| Cheap tarp | Floor, then a stair behind it — nothing else | Low materials in solos or duos; speed over safety |
| Sprint tarp | Hold floor while sprinting; Turbo Build handles placement | Cross open terrain fast, or saving mats in a solo clutch |
A few details separate clean tarps from messy ones. In straight-line tarping, place both side walls manually — Turbo Build frequently slams a wall in front of your face, blocking your view and making your movement predictable. The rhythm floor-floor-wall-wall should loop without a single missed beat. For stair tarps, drill the motion in both directions, because some zones pull left and others pull right, and a one-sided tarp fails you exactly when it matters. You can also add cones to the floor and roof of a straight-line tarp for extra padding when pressure is high.
In the endgame, that efficiency is real: rotating while burning the fewest possible pieces is regularly the difference between a top-15 finish and a top-three finish.

Winning the High Ground
Height wins build fights, but the way you take it matters as much as the fact that you take it. Before touching the 90s, learn the cone ramp rush: ramp up, cone on top of the ramp, then place a wall behind and a wall to your preferred side — and repeat. It's dramatically safer than naked ramping, and in duos or trios you can drop extra cones behind you so teammates can trail your build path safely under fire.
Once that's smooth, learn the classic take-height trick: ramp out, cone your ramp, quickly edit the cone to break it, then place a second cone while the first is still in its breaking animation. The new cone snaps on top of the old one and over the ramp, sealing the enemy out entirely. Add cones on both sides to block escape routes, and use the same combo to secure layers before you even reach them.
For raw vertical speed, three styles of 90s cover every scenario:
| 90 Type | Sequence | Strengths | Trade-offs |
|---|---|---|---|
| Classic 90 | Stair, wall on top, wall to the right, floor, ramp | Fastest climb — the floor "phases" you upward | Riskier, burns mats, predictable if spammed |
| Bizzle 90 | Stair, two walls (one atop the stair, one side), hug the wall, jump | Cleanest and most material-efficient; keeps crosshair level | Slightly slower than classics |
| Infinite 90 | Ramp, wall on top, wall to the side, another ramp — no jumping | No jump fatigue, low stress, free height when opponents quit climbing | Higher material cost over time |
The real skill is mixing them. Open with a classic 90 for a burst, switch mid-build to an infinite 90 to change tempo, and let opponents burn out while you keep climbing. You can even bait aggressive players into chopping underneath you, then drop down for an easy elimination. SCUF's breakdown of the classic ninety notes the same principle: swapping directions and techniques mid-climb forces opponents into fatal mistakes as they chase your height.
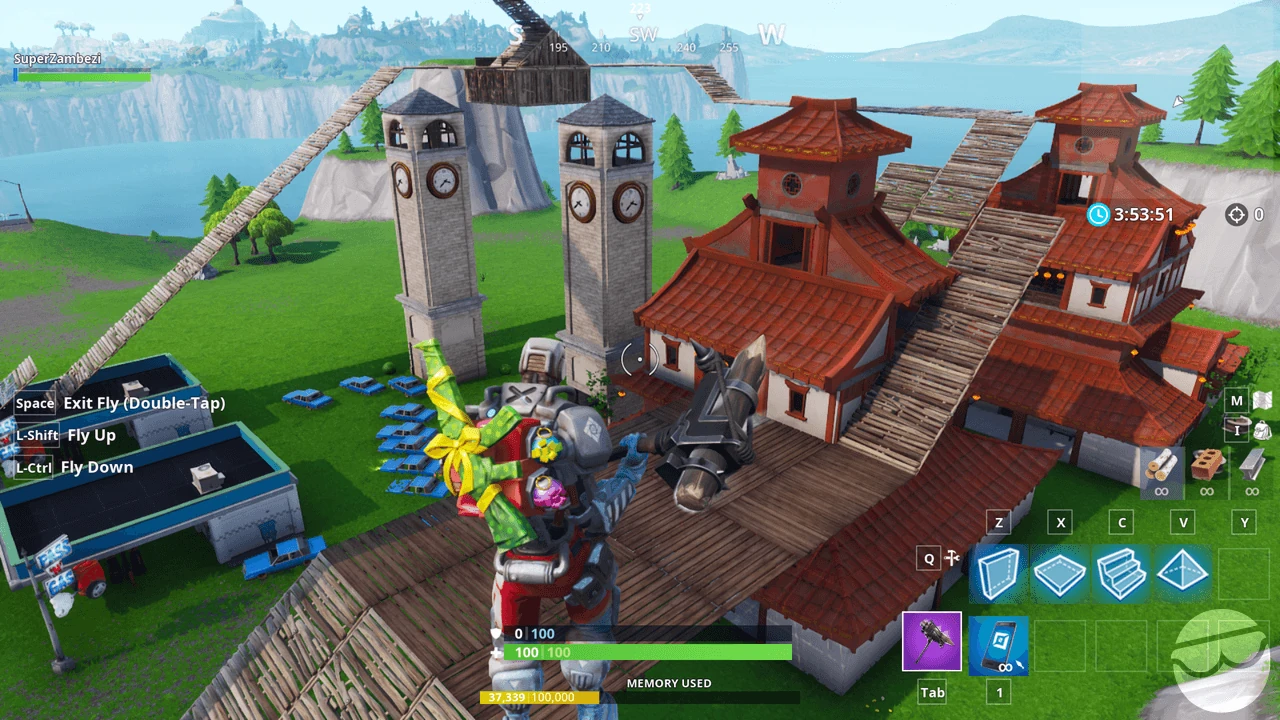
Piece Control and Box Fighting
Piece control — claiming the space around your opponent with your own builds before they do — is what turns even fights into won fights, and this EloBoss guide on fast edits and piece control calls it the fastest way to finish encounters.
The safe box approach. Always attack a box from a diagonal angle to maximize your pressure points. Immediately place three cones — front, left, right — which cuts off half their escape routes, then drop two walls on either side of you to stop a counter-piece. From there you can go for a peanut butter edit, a right-hand window peek, or jump the wall and spray from above. Apply pressure everywhere without overcommitting, and if they reset, simply rebuild the setup. The cone-first method works from low ground, even ground, or above.
Cones over walls. Aim your crosshair just above an enemy wall and your cone snaps into the tile beyond it — impossible to stop, no edit or exposure required. It's devastating for breaking stalemates, because nobody wants to fight someone who owns the top of their box. Drill it from multiple distances until placement is automatic.
Cones under walls. Harder to learn, insanely rewarding. Set up a line of floors and walls (cracking walls once with your pickaxe helps you see), angle your crosshair just under the wall frame, and place a cone beneath it. Too high or too far back and it misplaces. Landed correctly, you control the inside of their box without ever grabbing the wall — most opponents have no idea how they just lost the fight.
Cone slides. While attacking an opponent's box, quickly slide two cones out toward the side you want to pressure. You're pre-claiming their next move, denying space before they can take it, then following up with walls to seal the box.
Two supporting moves round out the kit: the two-wall connect (look slightly down, place two walls ahead, floor between them) stabilizes you when dropping layers, and the stair-cone combo lets you descend fast while minimizing fall damage. Neither is flashy — both save your life regularly.
Fortnite Best Weapons: Tier List and Loadout Guide November 2026
Movement Tech That Keeps Opponents Guessing
Predictable movement is dead movement. Two jumps, in particular, change how you retake and change layers:
- Diagonal jump. Line up on a gap in your tarp, jump out at a 45-degree angle, and place a floor and stair at the peak of the jump, then cone overhead. Timing is everything — too fast and your stair lands below you, wasting mats; too slow and your opponent pieces you up. Nail one direction, then chain jumps together, then learn the mirror.
- Side jump. Same setup, but face directly left or right and jump sideways, catching yourself with a floor and stair midair. The distance you travel decides whether you land on the stair (faster follow-up angle) or under it (protected from above) — both are useful. Chain multiple side jumps against strong trackers to make yourself impossible to pre-piece.
For retakes, the four-wall cone retake is arguably the strongest technique pros use: from a ramp, wall right and behind, stack a wall on top, connect the fourth wall left, then jump forward and place a cone on the roof that reaches the highest wall. It's compact, fully protected from the sides and above, and blocks anyone tracking you from high ground. Train it mirrored in both directions, and in squads, chain it into a tarp so teammates can follow you up layers safely.
Settings and Practice Habits That Actually Make You Faster
Technique dies at the mercy of bad settings. The consensus across guides is clear on the essentials:
- Dial up build sensitivity well above your aim sensitivity. Fortnite building demands instant crosshair repositioning that slower, accuracy-tuned settings can't deliver, as SCUF's controller guide explains.
- Use Builder Pro on controller, give build and edit separate buttons, and consider paddles or claw grip so your thumbs stay on the sticks.
- Optimize keybinds on mouse and keyboard — walls and ramps on easy-to-reach keys, edit and build keys adjacent, mouse buttons for critical pieces.
- Enable Turbo Build for 90s, sprint tarps, and defensive wall-spam, but place straight-line tarp walls manually to avoid blocking your own path.
- Tune sensitivity per role: higher for building speed, balanced for aim, and turn off vibration to cut input delay.
Then practice deliberately, not randomly. Slow-motion reps in Creative beat spamming: perform each build combination correctly at low speed, audit your mistakes from behind your build, and only then add velocity. The YouTube tutorial behind much of this advice emphasizes rewinding and repeating until each motion clicks — that loop of slow, clean reps followed by review is how muscle memory actually forms.
Fortnite Competitive Play: Core Skills Built in Trio Scrims
FAQ
What should I learn first when practicing Fortnite building tips? The box, without question. It's the gateway mechanic — every tarp, retake, and piece-control setup assumes you can box up cleanly and consistently. Build a long line of boxes in Creative at low speed, check for errors, and only chase speed once placement is clean.
How do I build faster on controller? Switch to the Builder Pro layout so every piece has a dedicated button, raise your build sensitivity well above your aim sensitivity, and practice placing pieces midair until switching between wall, ramp, floor, and cone is automatic.
Which type of 90 should I learn first? Start with Bizzle 90s — hugging the wall keeps your crosshair level and minimizes wasted motion, so they're the easiest to make consistent. Add classic 90s for explosive height and infinite 90s for no-jump, low-fatigue climbing, then mix all three to stay unpredictable.
How do I rotate without running out of materials? Match the tarp to the stakes. Use cheap tarps (floor plus a stair behind it) or sprint tarps when mats are critical, reserve fully-walled straight-line and zigzag tarps for high-pressure late-game zones, and add cones only when you genuinely need extra protection.
Does building still matter in Fortnite? Yes. Despite periodic no-build modes and events, building remains central to the standard experience, and players who can't build consistently lose fights to equally-aimed opponents who can — a point SCUF makes directly in their building guide.
Where can I see these techniques demonstrated? The full walkthrough from Seoscout's source material, "How To Build in Fortnite — Pro Tips & Fastest Techniques" on YouTube, demonstrates all twenty techniques in order, from your first box to advanced retakes, and is easy to pause and rewind while you practice each move in Creative.
Related Guides
Fortnite Best Weapons: Tier List and Loadout Guide (November 2026)
Ranking the Fortnite best weapons for the Treasure Hunters season, including the Gilded Dragoon Shotgun, Usopp's Slingshot, and the strongest Zero Build loadout.
Fortnite Competitive Play: Core Skills Built in Trio Scrims
A practical breakdown of Fortnite competitive skills—team communication, zone rotations, resource discipline, and trio roles—drawn from real scrim gameplay.
Fortnite Ranked Levels Explained: Every Rank in Order and How to Climb
A complete guide to Fortnite ranked levels: all 8 ranks in order, how progression really works, tips to rank up faster, seasonal resets, and what's changing in 2026.
Fortnite Ranks Explained: All 22 Ranks in Order and How to Climb
A complete guide to Fortnite ranks, from Bronze to Unreal and Unreal Legends, including how the ranked scoring system works, rank resets, and tips for climbing fast.